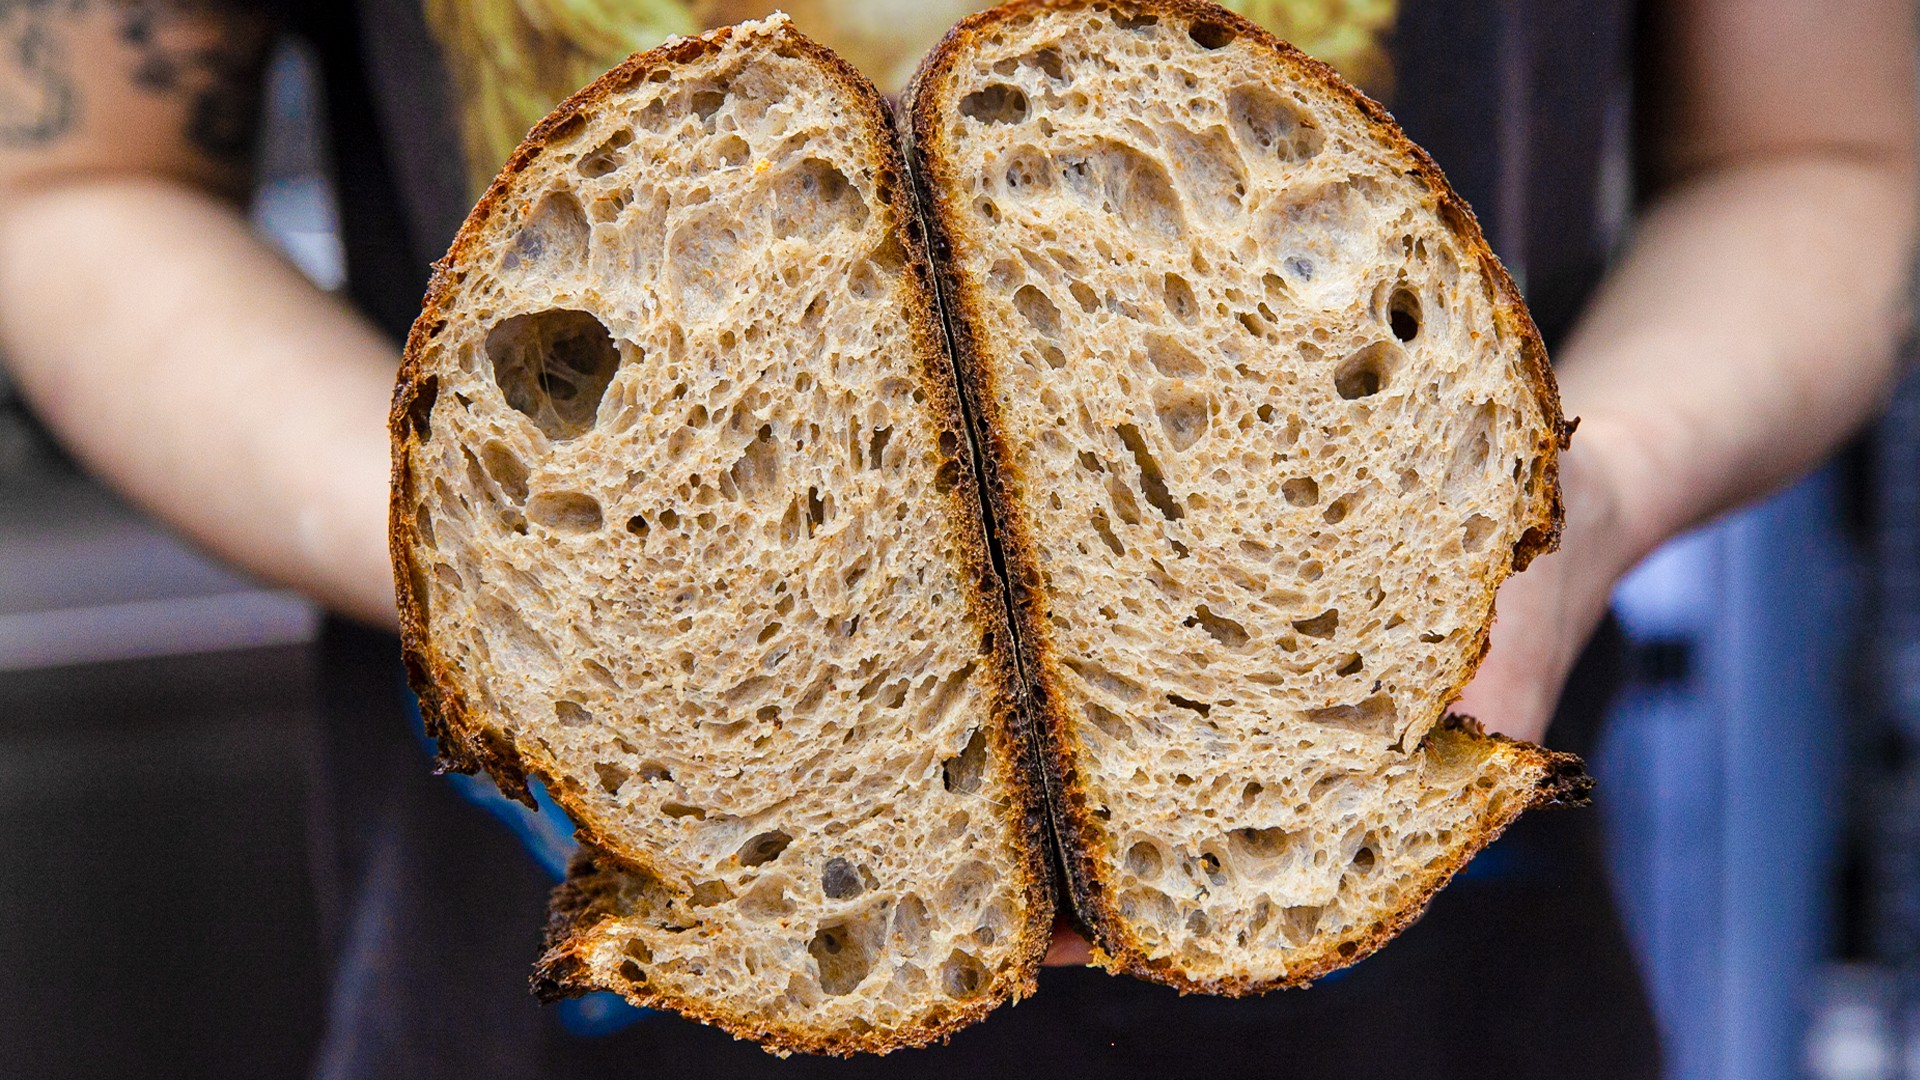
Photo by Farideh Sadeghin
Makes 1 loaf
Prep time: 10 minutes
Total time: 2 days INGREDIENTS 2 ½ cups|373 grams bread flour
½ cup + 1 tablespoon|85 grams whole wheat flour
¼ cup + 1 tablespoon|43 grams rye or spelt flour
3 ½ ounces|100 grams ripe starter
1 tablespoon kosher salt
rice flour or semolina, for dusting DIRECTIONS
Prep time: 10 minutes
Total time: 2 days INGREDIENTS 2 ½ cups|373 grams bread flour
½ cup + 1 tablespoon|85 grams whole wheat flour
¼ cup + 1 tablespoon|43 grams rye or spelt flour
3 ½ ounces|100 grams ripe starter
1 tablespoon kosher salt
rice flour or semolina, for dusting DIRECTIONS
- In a small saucepan, heat 1 ⅔ cups|400 ml of water to 80°F. Remove 2 tablespoons and reserve.
- Mix the remaining water and flours in a large bowl until a shaggy dough forms, about 2 minutes. Let the dough rest, covered, for 30 minutes. (The period of time between your first and final mix is called an “autolyse.”)
- Once the dough has rested, add the remaining 2 tablespoons of water in a slow and steady stream. Stretch and knead the dough down, building strength. The dough will be wet and sticky at first but keep working it until all the water is absorbed. Mix for about 3 minutes. (Don’t be afraid to add a tiny extra splash of water if you need to handle the dough more easily.)
- Add the ripe starter to the dough and continue kneading, pulling up and pressing down in a fluid motion until the dough absorbs all of the starter, about 3 minutes. Add the salt and mix for an additional 2 minutes. Cover and rest in the mixing bowl for 20 minutes.
- Spray a glass or plastic container or bowl with nonstick cooking spray. Lift the dough from the mixing bowl and fold the dough over itself, tucking the edges under the dough to create tension and strength. The dough should become tighter and sit taller in the container after each turn. Cover with a lid or a towel.
- In a room that is roughly 74°F, let the dough rest, or “bulk ferment,” for about 4 hours or until it has grown ⅓ in size. Fold the dough over once every hour during this time for the first 3 hours. This helps ensure good tension and strength in your final loaf.
- Meanwhile, ready your proofing basket. (A bread basket or banneton is ideal but any non-metal bowl will work.) Place a kitchen cloth in the proofing basket. Lightly dust the bowl with rice flour or semolina flour. (This prevents the dough from sticking to the basket.)
- After the 4 hours have passed, turn the dough out onto a lightly floured surface and, using both hands, gently shape the dough into a tight round. Let rest for 30 minutes.
- After 30 minutes, reshape the dough into a tight round using your hands to pull the glutinous “skin” around and towards the bottom, tightening the ball. Flip the dough over and set it in the proofing basket with the seam bottom-side up. Cover the loaf with a kitchen towel. Proof at room temperature for 1 ½ to 2 hours, or until the loaf has grown by another ⅓ and can hold a finger impression without bouncing back. After it has fully proofed, carefully place the loaf in the refrigerator overnight until ready to bake.
- The next day, heat the oven to 465°F and place a dutch oven with a lid inside to heat for 40 minutes. Prepare a 18-inch-by-13-inch sheet of parchment paper and a bread knife for scoring. Remove the loaf from the refrigerator. Carefully dust the top of the loaf in the proofing basket with rice flour or semolina flour and gently place the loaf in the middle of the parchment. Remove the dutch oven from the oven and place on a heat-proof surface.
- Gently cut or score a hashtag into the loaf, and then gently hoist the scored loaf by grabbing both sides of the parchment and placing it into the dutch oven. Cover it with a lid immediately to capture the steam.
- Place the dutch oven in the oven and bake for 43 minutes. Drop the oven temperature to 410°F and remove the lid of the dutch oven. Finish to desired coloring, about 4 minutes. Let the bread cool completely on a cooling rack.
