This story is part of OUTER LIMITS, a Motherboard series about people, technology, and going outside. Let us be your guide.
So you want to help protect wildlife and scrub the GPS data that might be embedded in your photos? Great!
Videos by VICE
First, know that when you upload an image to a majority of popular social media sites (i.e., Facebook, Twitter, Instagram), the EXIF data (where location info can hide) is automatically deleted.
“But Asia,” you say, “Who knows if they’re actually deleting the data. I have to nuke the EXIF myself. It’s the only way to be sure.”
You’ve convinced me with that Aliens reference. Here’s a brief, non-comprehensive walkthrough to make sure your images are squeaky clean.
Turn Location Services Off
An ounce of prevention is worth a pound of cure. Make sure any location services are off when you’re taking pictures with your phone or camera. If this is turned off, location info isn’t attached to the image, and you don’t have to worry about it!
For iPhone
You will need the ViewExif app ($0.99). Once you’ve downloaded ViewExif, open Photos and select which image(s) you want to share. You should be able to see ViewExif’s snowflake-like icon. Tap on the icon and you should see the image’s metadata. Click on the share icon in the upper left and a prompt should show up, giving you the choice to save or share without metadata, or to share with the metadata.
For more, check out this CNET walkthrough.
For Android
You’ll need to download the (free) Photo Exif Editor from the Google Play store. Once it’s downloaded, open and click on the ‘Photos’ icon. Browse to the image that you want to scrub.
Click on the image, and then click on the ‘Remove Exif’ button in the upper right. A new screen should pop up with all of the removable metadata. To remove GPS information, check the ‘Geolocation’ box, and then hit ‘Save.’
On Desktop (Mac)
There is a downloadable (free) app called ImageOptim that is able to remove EXIF data (and reduce your image’s file size). Simply drag and drop your image into the app’s window.
You can also use Preview. Open the image in Preview. Go to ‘Tools,’ and then ‘Show Inspector.’ A ‘General Info’ window should pop up, along with a series of four tabs below. Click on the ‘i’ tab (to the right of the page tab). The window should now be named ‘More Info,’ and there should be four tabs, including a ‘GPS’ one.
(If the GPS tab isn’t there, congrats! The image has no embedded location information.)
Click on the GPS tab. There should be a map. Click on the ‘Remove Location Info’ button on the bottom. Remember to save the file so that the information is truly gone!
On Desktop (PC)
If you have Windows versions 8.1 or above, this is simple.
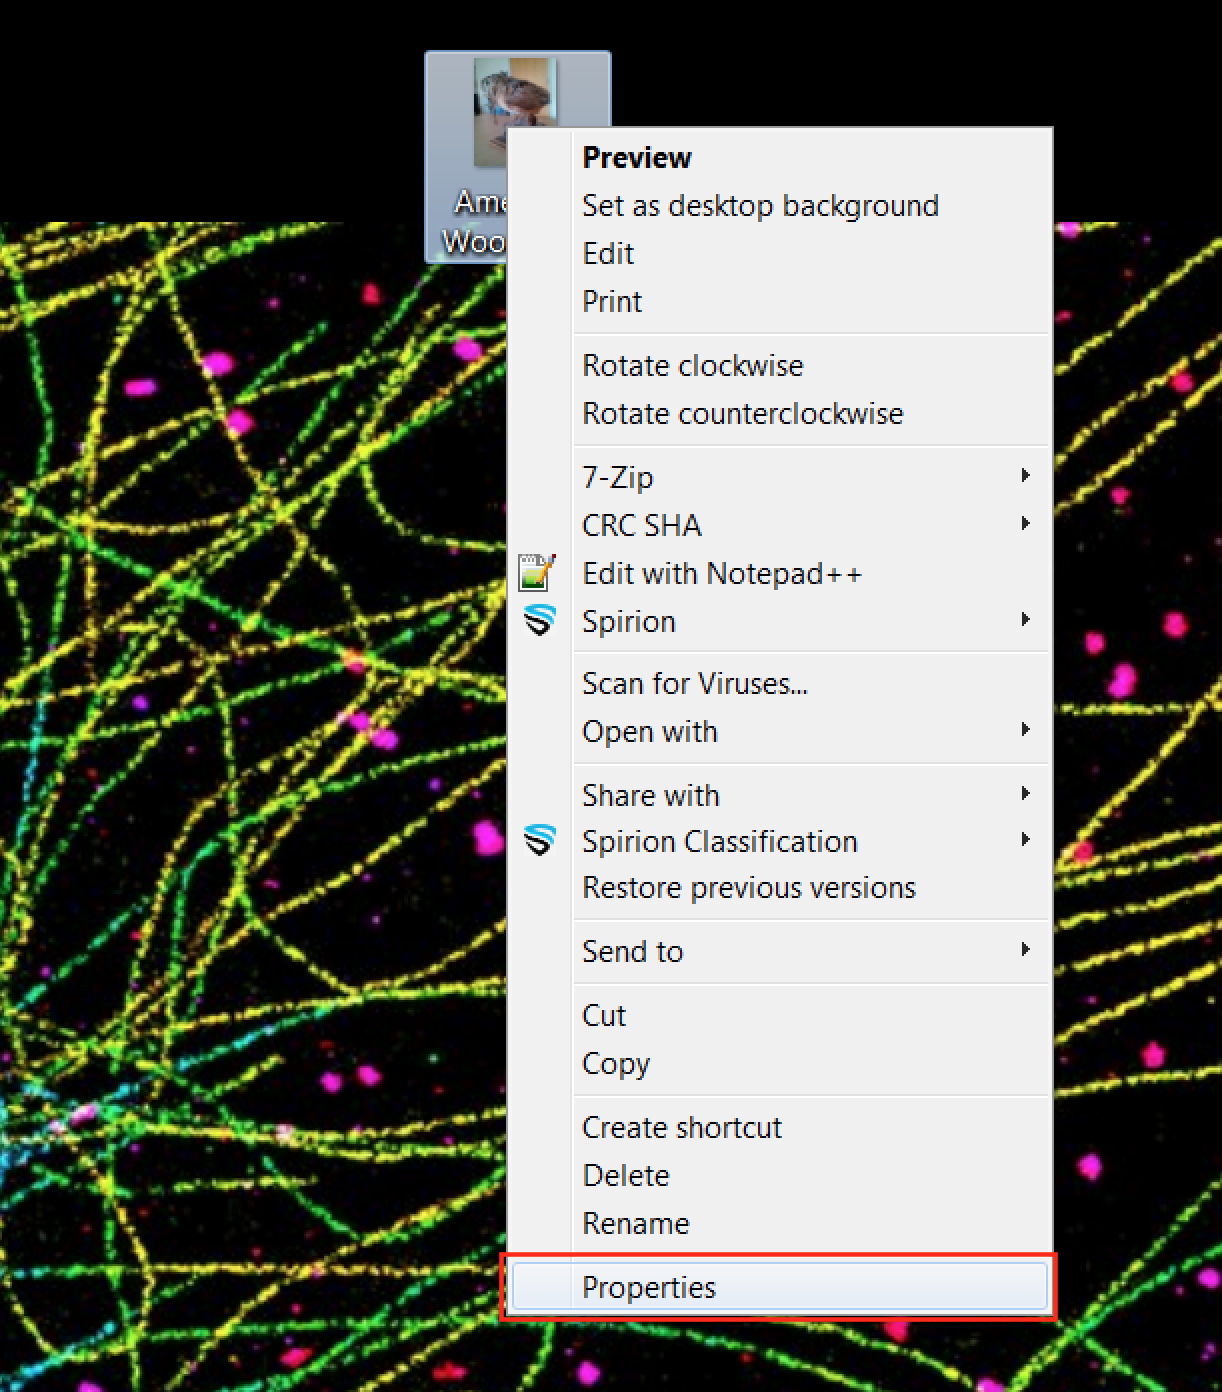
Right-click on the image and then click ‘Properties.’ In the new pop-up window, head over to the ‘Details’ tab.
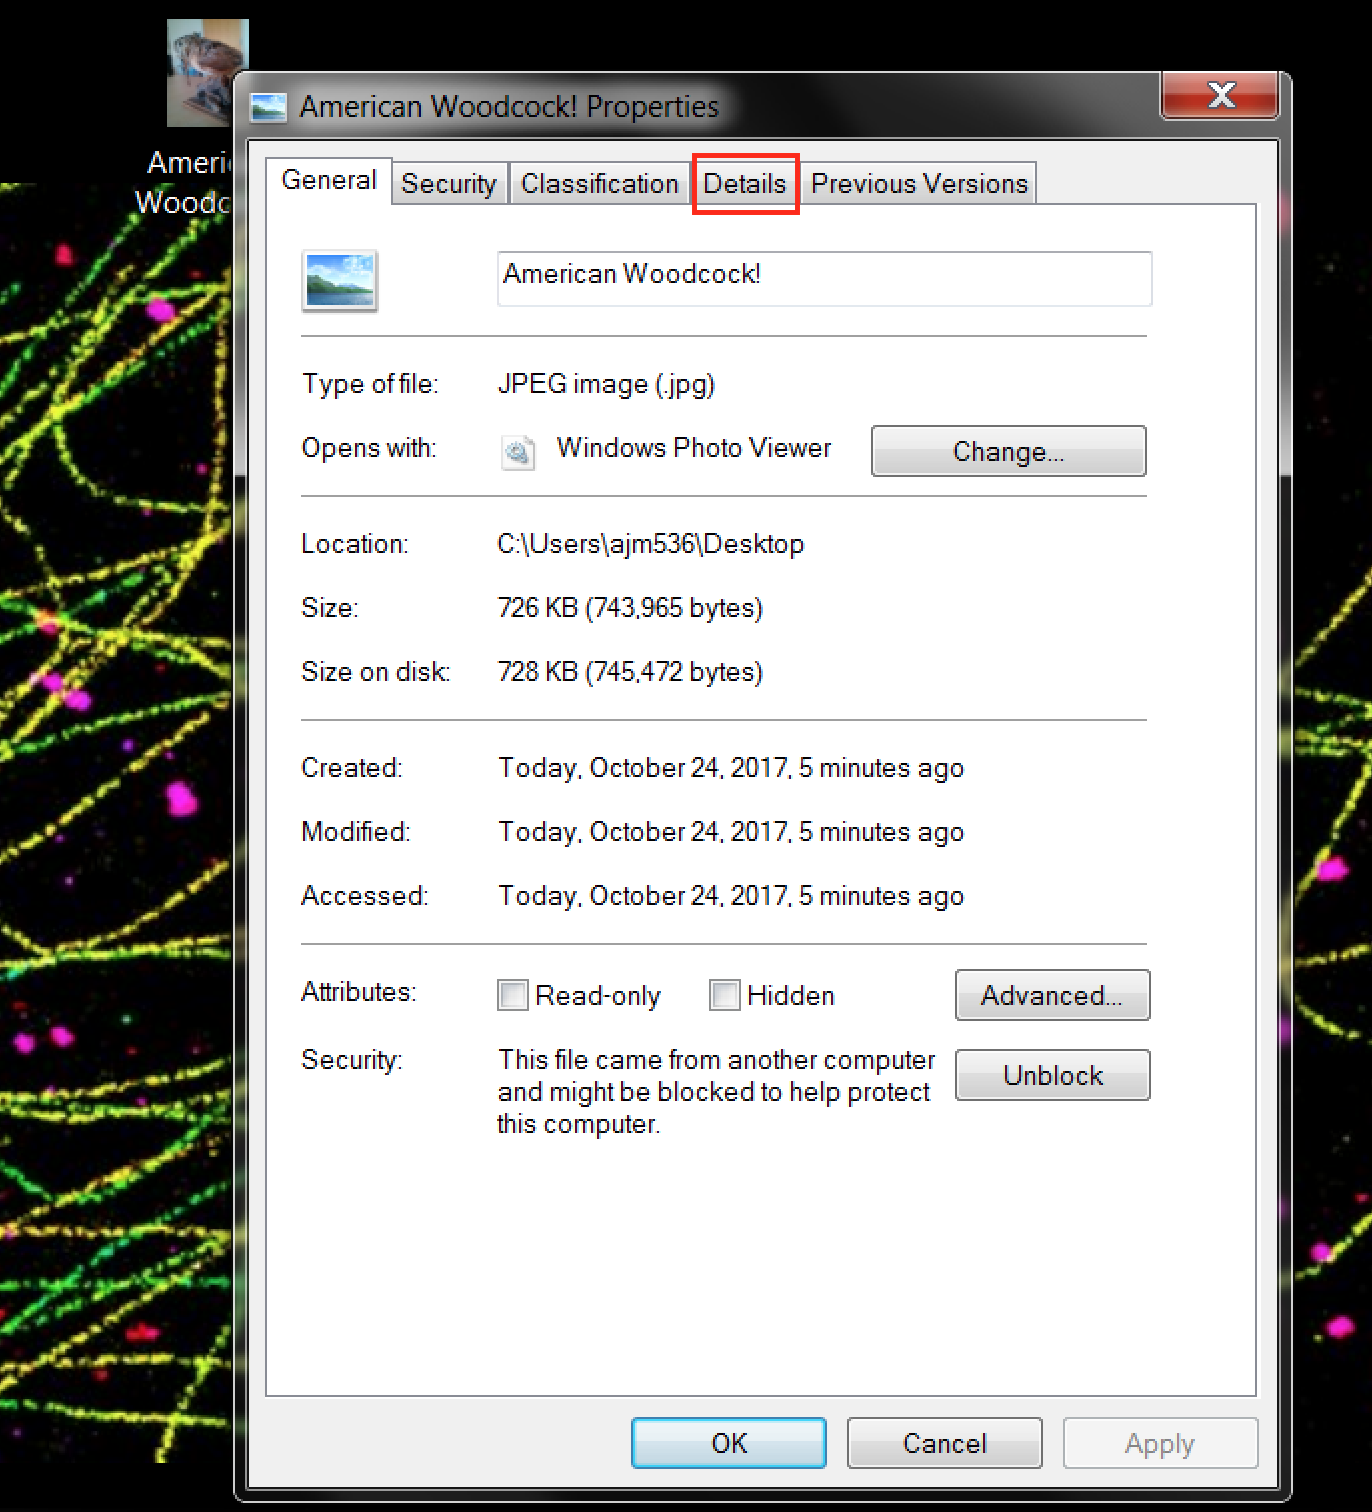
Click on the ‘Remove Properties and Personal Information’ link at the bottom of the window. You should have a choice between removing the image’s information while creating a copy that saves it and simply removing the image’s information.
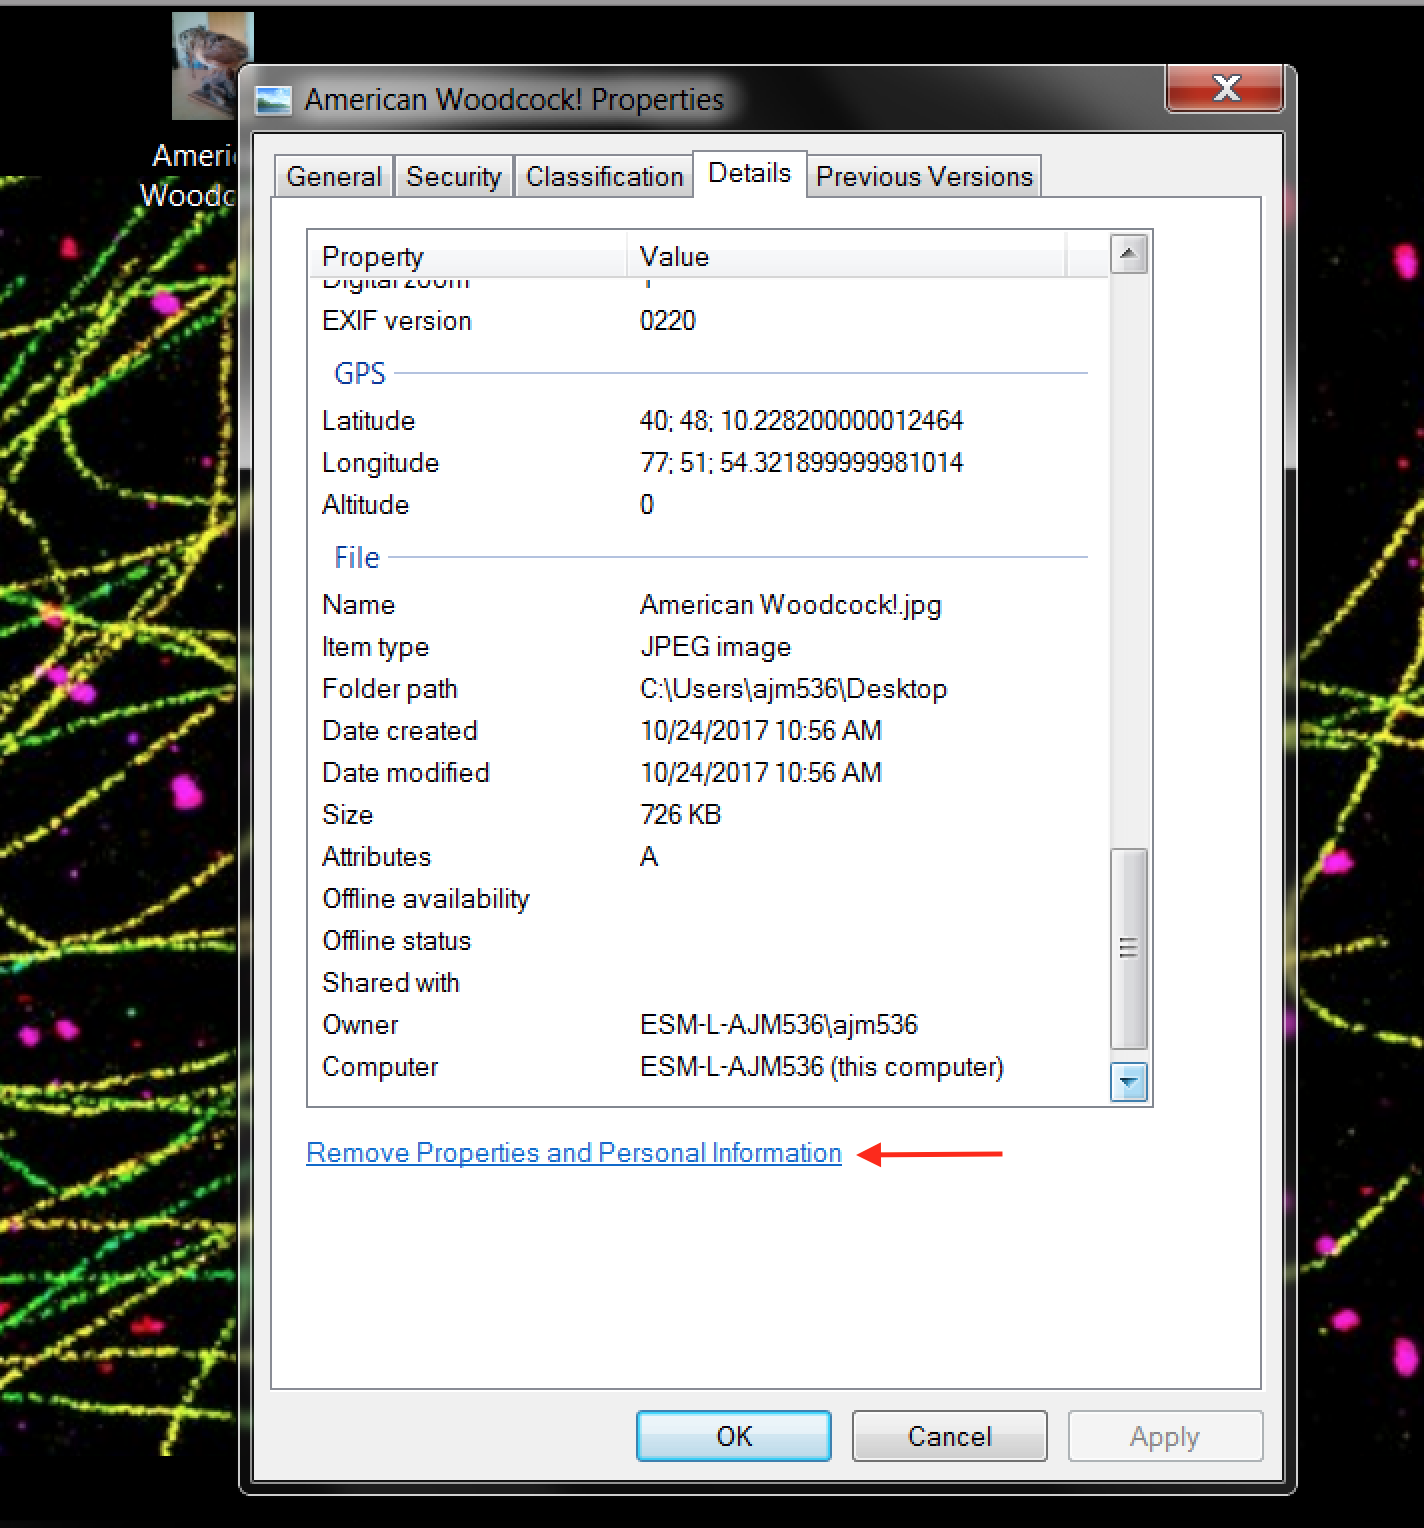
However, this function doesn’t work on Windows 7. The easiest way to workaround this is to save the image as another file. Open up Word or Powerpoint and insert/copy the image in.
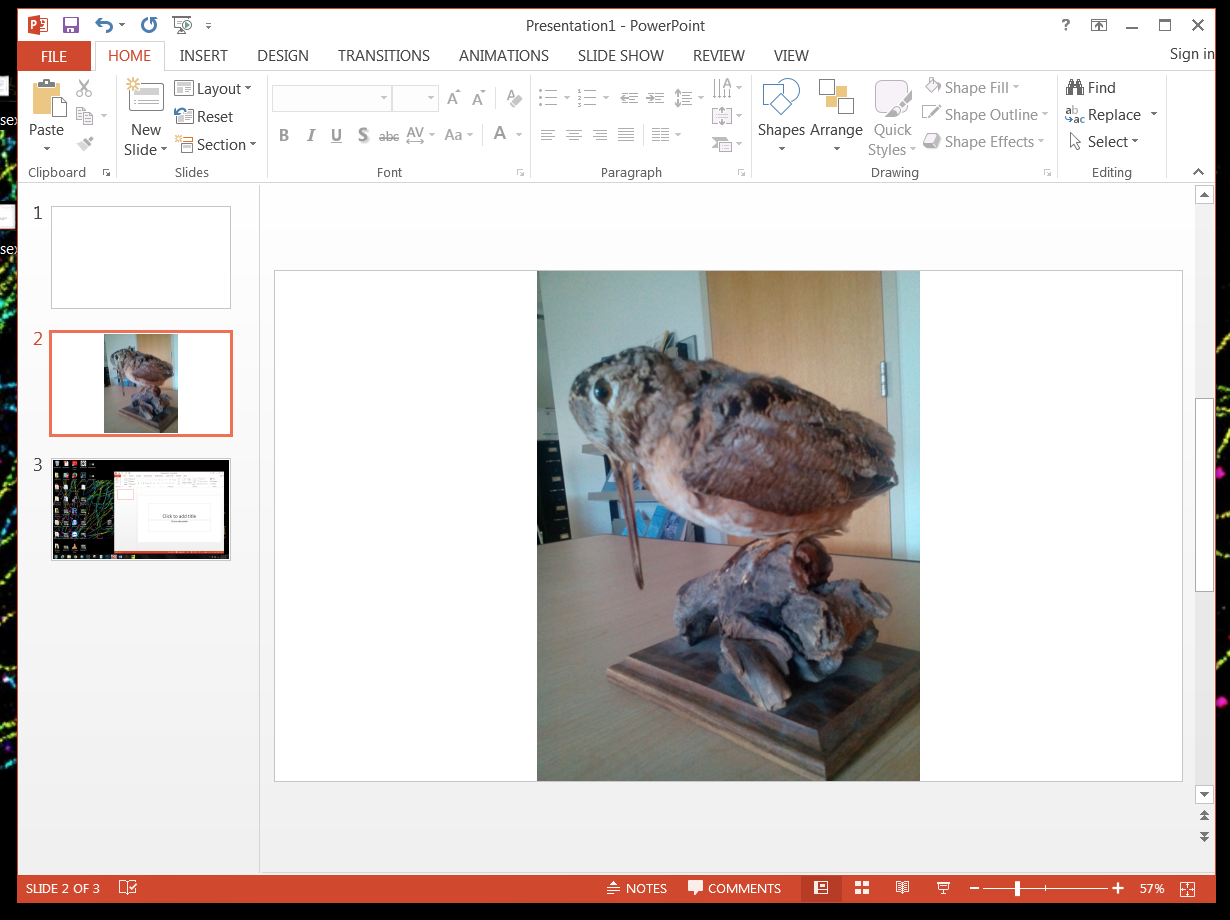
Then, right-click on the image, and ‘Save As Picture.’
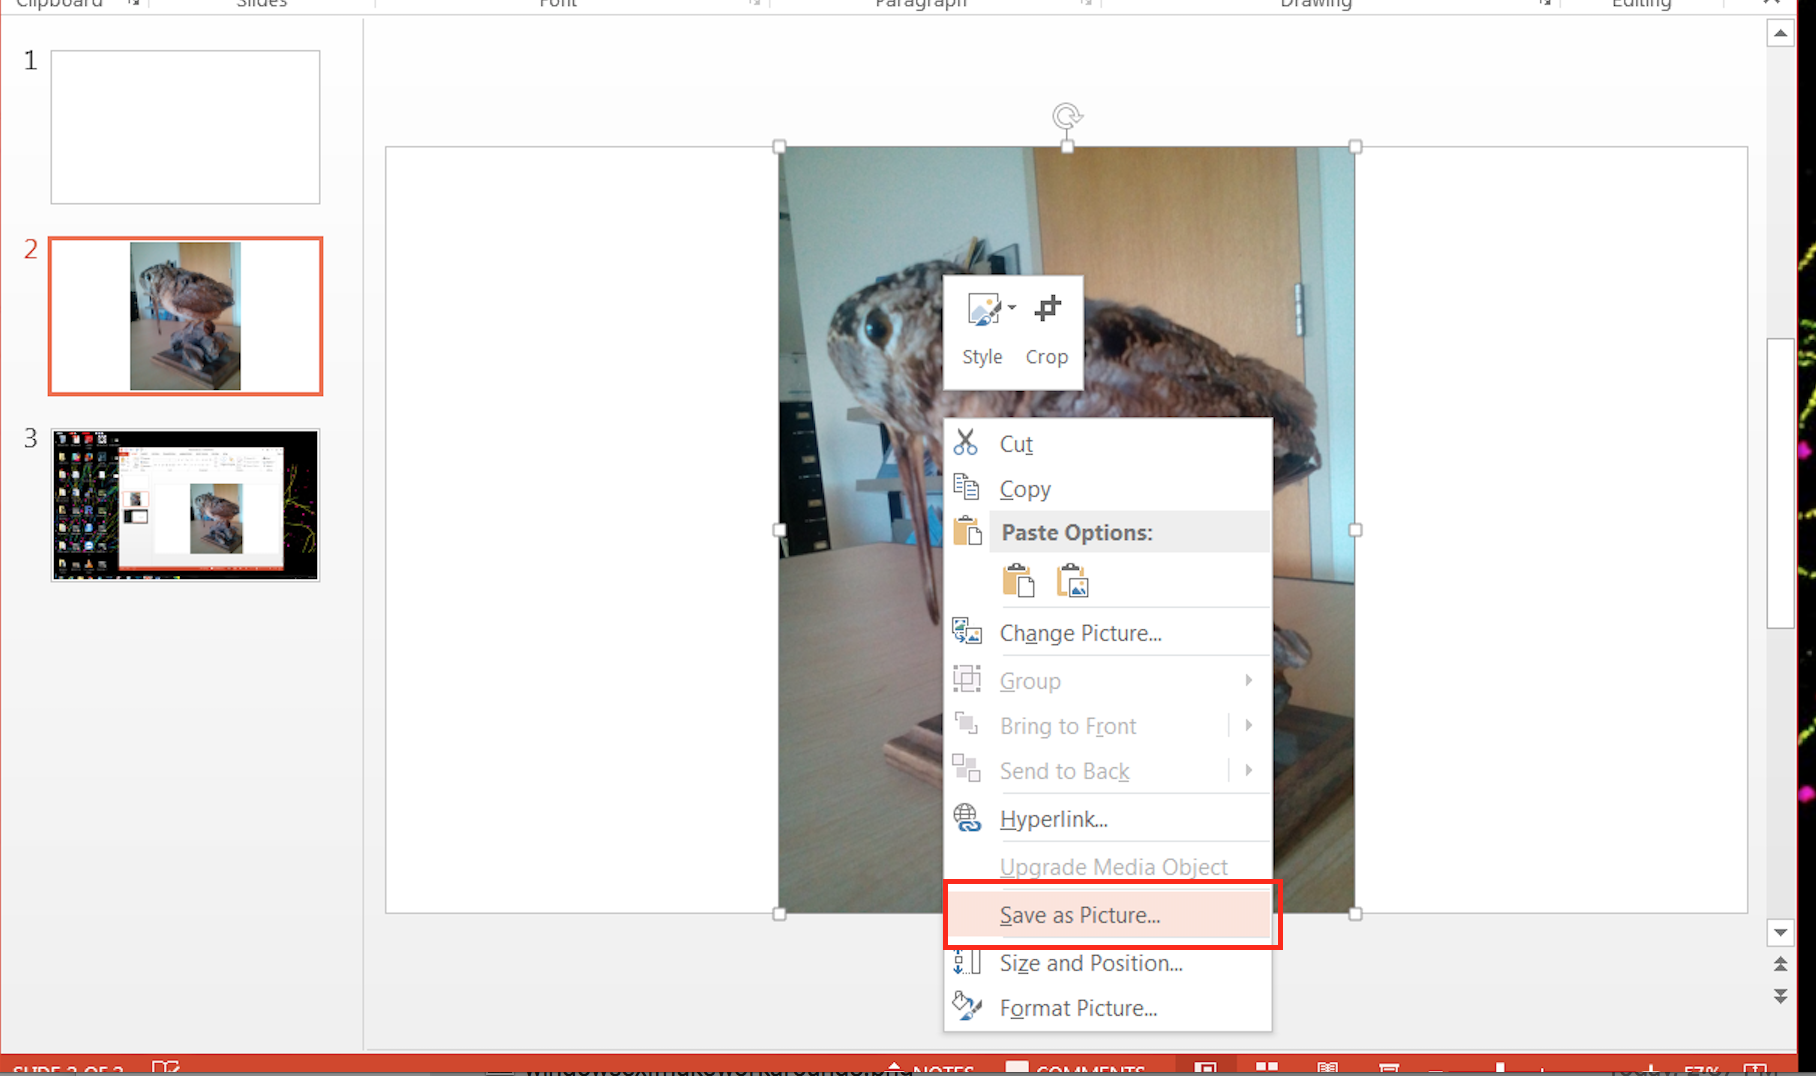
This new image should be scrubbed of metadata.
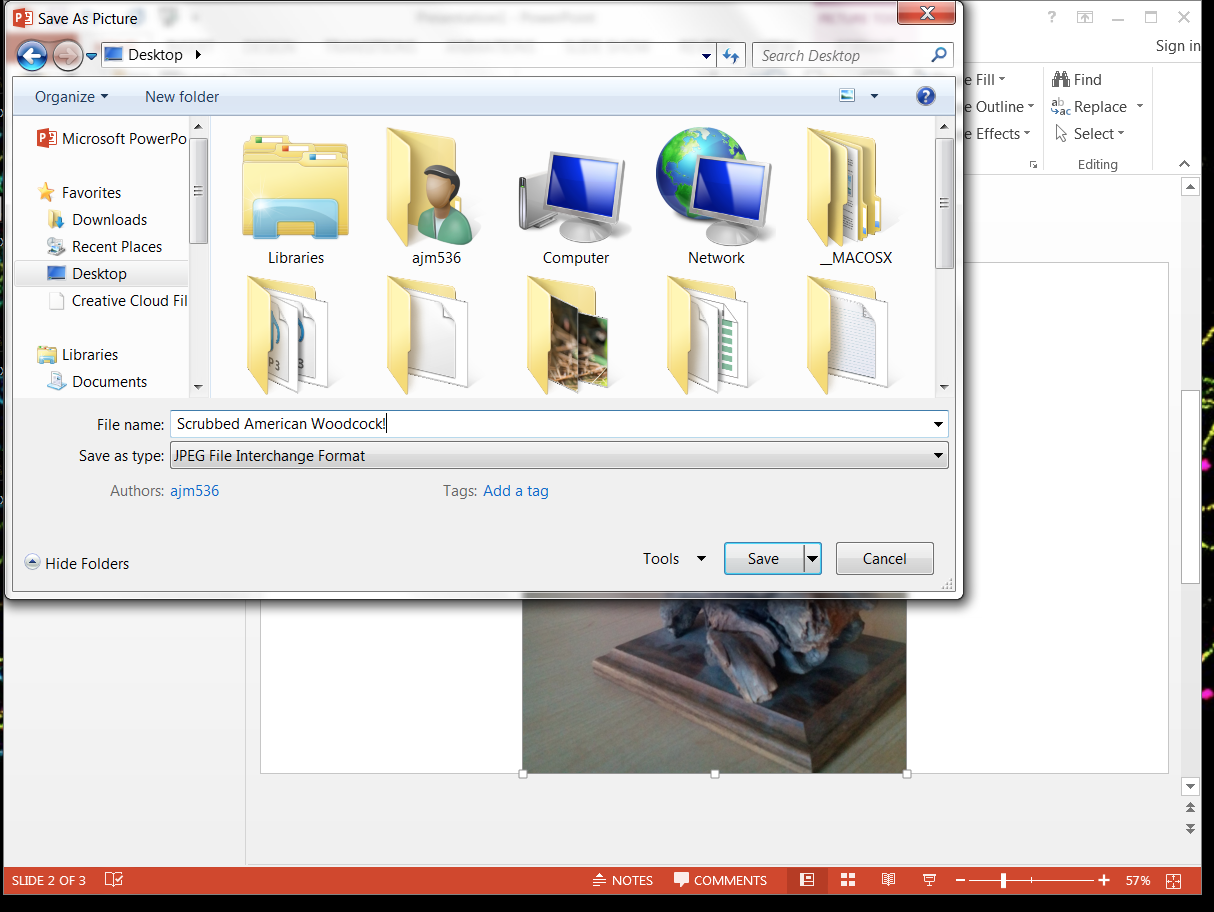

And there you have it. Happy scrubbing!
GIFs by the author.
Get six of our favorite Motherboard stories every day by signing up for our newsletter.
More
From VICE
-

Screenshot: Butterscotch Shenanigans -

AEW -

Screenshot: Train Sim World (YouTube) -

Jamali with Chicago gang members.
