
It’s that time of year again. Let’s revisit how to roll a turkey joint for Thanksgiving, courtesy of world-class joint roller Tony Greenhand’s wisdom. Many years ago, Tony showed VICE how to roll this beautiful turkey-shaped creation. If you want to roll one up for yourself this holiday, read on.
But first, let me defend myself. This guide starts off with pictures from my own attempt at creating a turkey joint. But I’m not a gifted rolling artist and I struggled hard with this. Let me remind you that Tony Greenhand is a master joint roller who makes incredible joint art from smokeable Squirtles to praying mantis joints. If you, like me, struggle to pull off a good turkey joint, don’t beat yourself up. It’s all in good fun.
Videos by VICE
Turkey Joint Supplies

To make a cluckin’ good turkey joint, you’ll need the following items:
- Pack of rolling papers (go for a natural, turkey-colored option. Don’t use white like I did.)
- Grinder
- Scissors
- Paper
- Rolling glue*
- Lots of weed (check out our list of best THCa flower if you need to stock up)
- 5 to 7 pre-rolls or hand-rolled joints (I used Cheech & Chong’s pre-rolls)
- Paintbrush (or fingers, if you’re messy)
*Rolling glues are made with safe-to-inhale ingredients. Under no circumstances should you use any other type of glue to roll this joint. If you don’t have rolling glue, you can try a small mix of honey and water to serve as an adhesive.
I don’t have any rolling glue on hand, so I went ahead and mixed a dollop of honey with a small amount of warm water to dissolve.
Turkey Joint Directions
Step 1: The Body
- Grab three rolling papers and lay them flat in a row. Connect them by slightly overlapping each end to create a long row of three connected papers.
- Lightly paint your rolling glue or honey mixture over each overlapping end to create an adhesive.


- Fold over and crease the top glue strip on one end.
- Fold the square in half to make a triangle.

- Following the glue strip, add more adhesive to one side to seal it shut and create a little cone.
- Blow air through the opening to inflate.
- Fill the body with 5-7 grams of ground weed.
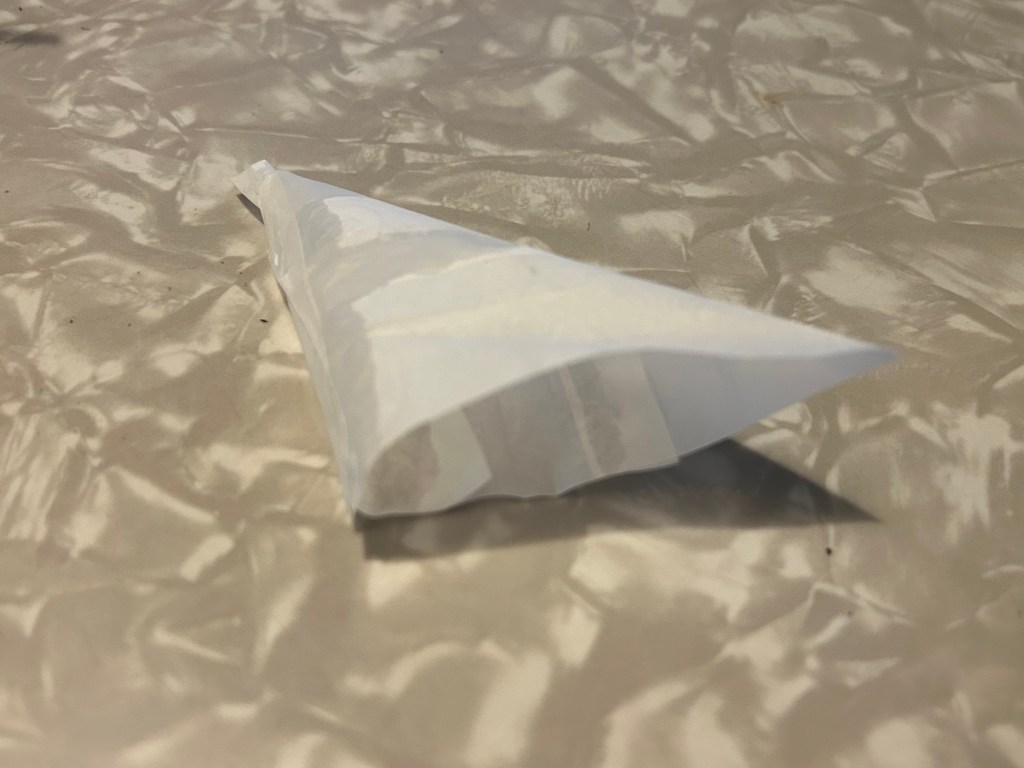

- Pack it tight and then fold the open top over and twist shut.
- Set the body aside.
At this point, I was feeling pretty good about the body I had rolled up. Upon further reflection, it should have been stuffed a lot tighter. And I should have been more diligent about the creases and glue to keep it from getting soggy and out of shape. But hey, hindsight’s 4/20, right?
Step 2: The Crutch
- Cut two strips of paper 2-3 inches long and about the same width as your rolling paper.
- Roll them together to create a large and sturdy crutch.
- Take a rolling paper and roll it around the crutch. Add your adhesive to make it stick.


At this point, I was still feeling foolishly confident.
Step 3: Attach the Crutch to the Body
- Carefully reopen the top of your turkey body.
- Insert the crutch and re-twist the body shut.
* If you need to add more rolling paper to seal the body or cover the top of the crutch, go ahead and wrap some more around and add more adhesive. I had to re-seal my body and add an extra layer of paper around the top of the crutch to keep it stable.
This is where my turkey began to unravel. I did not have it stuffed tight enough to begin with, which left me with a squishy mess that became hard to secure. Still, I carried on. Yours should look like the image below, rolled by someone with real skills.

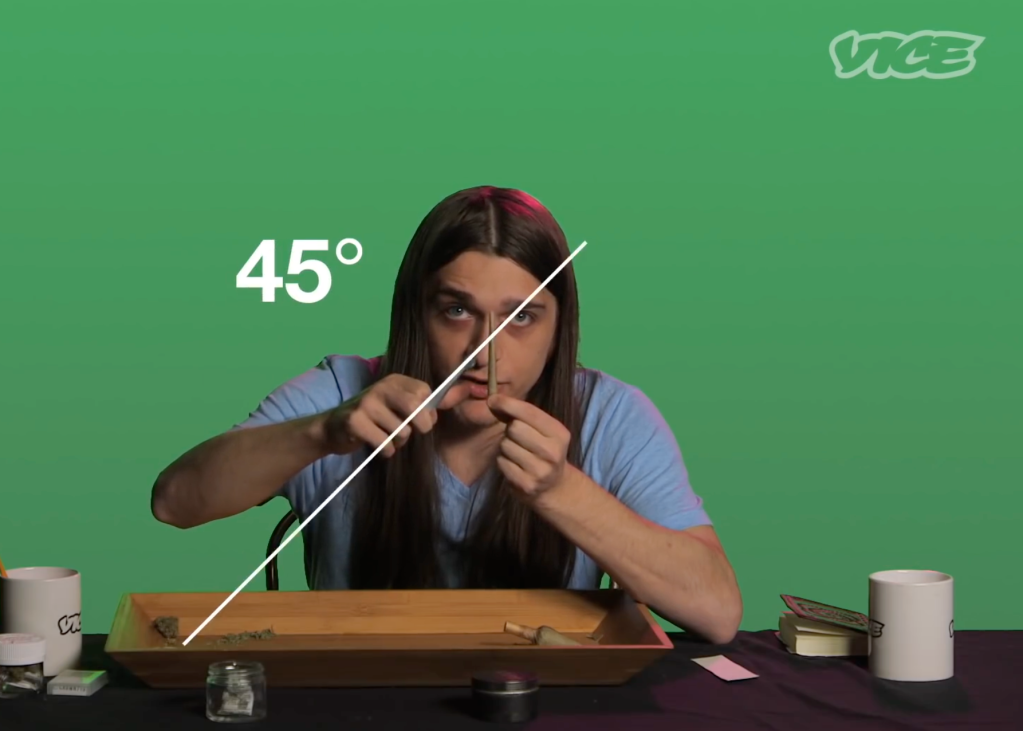
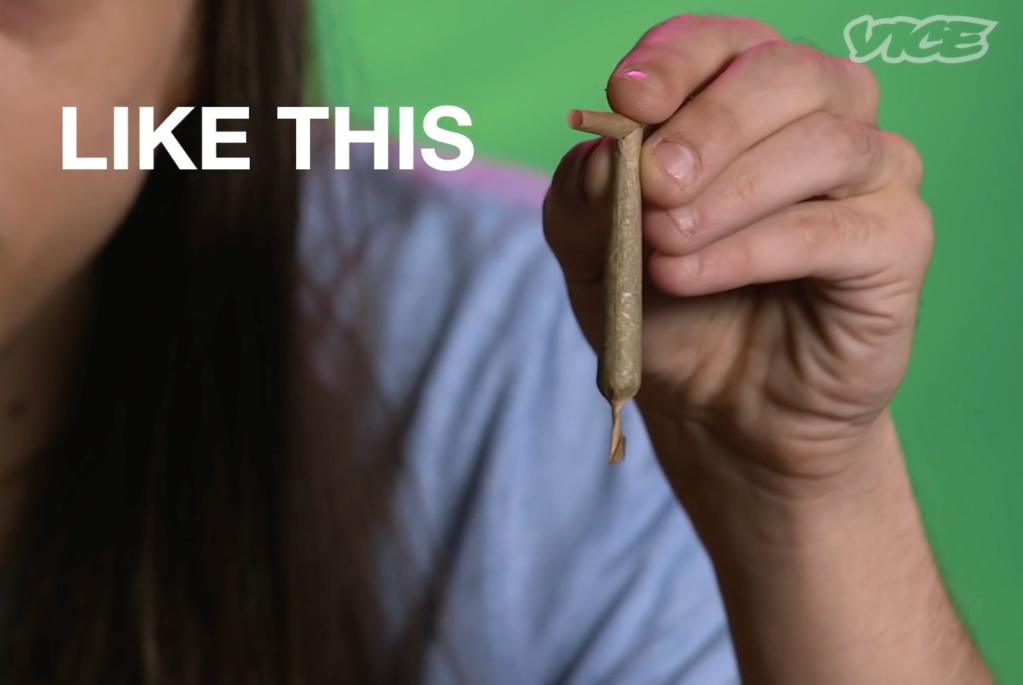
Step 4: The Turkey Head
- Cut the crutch off of one of your joints at a 45-degree angle
- Cut two small squares of rolling paper
- Use the squares of rolling paper to re-attach the joint and crutch at an angle, creating the look of a turkey head. Use a generous amount of adhesive to keep this together.
This is where it became clear how ugly my turkey was becoming. I should have used a different colored rolling paper, not bright white (among all the other problems).

Step 5: The First Feather
- Evenly cut the crutches off of all your pre-rolls.
- Cut a small hole near the crutch to insert one joint.
- Secure the feather with small cut squares of rolling paper and glue.


Step 6: The Head
- Cut the tip of the body off at a 45-degree angle
- Cut the bottom of the turkey head (the neck) at a 45-degree angle the other way
- Attach the neck to the tip of the body by bringing the opposite angles together
- Use small squares of cut rolling paper and your adhesive to secure the neck in place
- Make sure you secure the bottom of the neck and body with an extra strip of paper and adhesive
At this point I finally gave up. My turkey looked like it had been hit by a car that proceeded to back up and roll it over again and again. Not pretty.

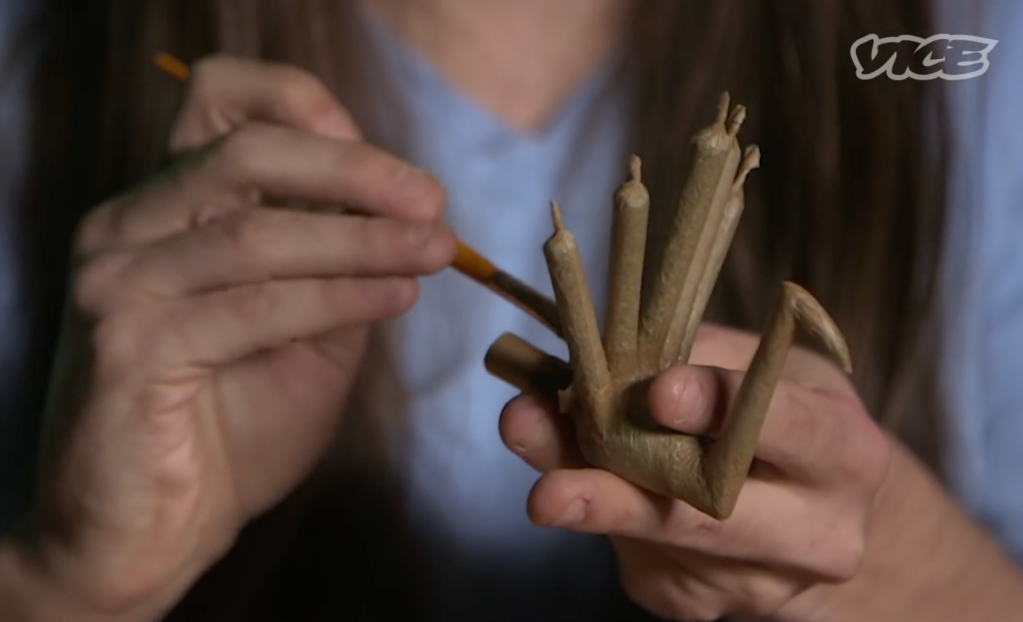
Step 7: The Final Feathers
- Add more feathers in a row on either side of your first feather
- Continue the same process as before, cutting a small hole near the crutch and inserting your joint
- Carefully add paper and adhesive to each feather to secure
*Optional: Crumple up a tiny bit of paper and adhere it under the turkey head to create a wattle
Step 8: Smoke That Turkey
- If your pre-rolls or joints have twisted ends, cut them off to allow easier lighting
- Light the turkey head and all feathers
- Inhale and give thanks that you successfully rolled a turkey joint. If your turkey joint was also a disaster, give thanks that we live in a time where we can spend our Thanksgiving holiday rolling up wacky joints for the fun of it.
As a special treat, you can see what the end of my project looked like after many attempts to repair. Again, don’t be like me.

Need video instructions to avoid my level of mess? Check out this footage from when Tony showed us the ropes:
Stock up on flower and pre-rolls for your turkey joint


Cherry Kush THCa Flower (opens in a new window)

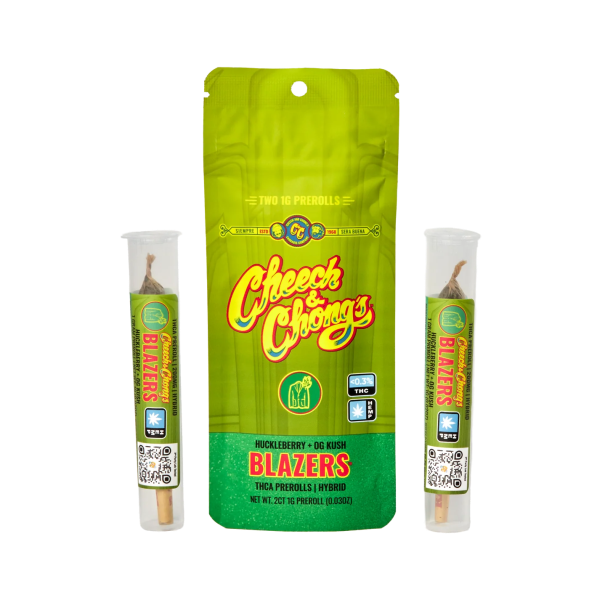
Huckleberry + OG Kush THCa Pre-Rolls (opens in a new window)
More
From VICE
-

Daniel Garrido/Getty Images -

-

Steve Jennings/Getty Images -

Screenshot: The Pokémon Company